Sistem Operasi MacOS
Panduan ini menjelaskan cara instalasi dan konfigurasi WireGuard di MacOS untuk terhubung ke Helium VPN Server.
Langkah Instalasi
- Instal aplikasi WireGuard dari App Store.
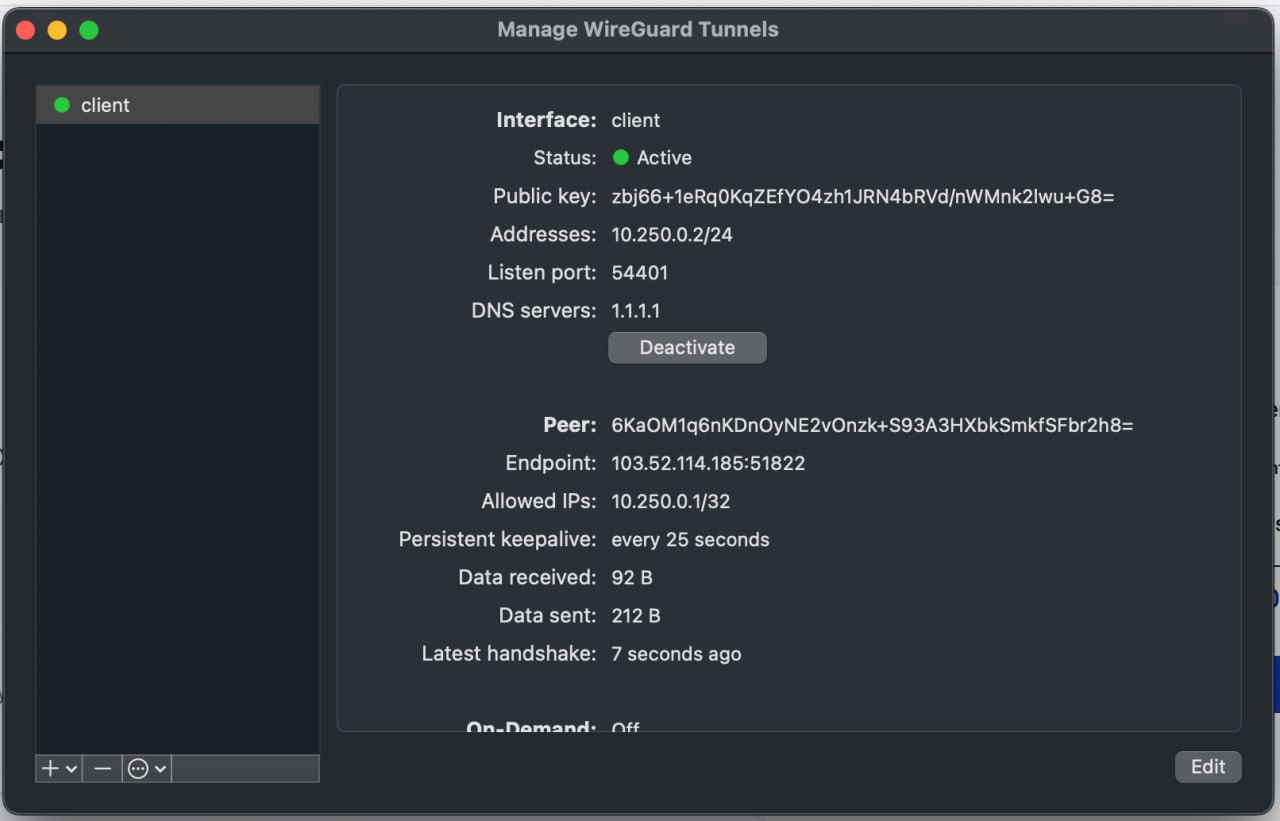
- Buka WireGuard lalu pilih Import tunnels from file.
- Pilih file konfigurasi VPN Client yang sudah diunduh sebelumnya. Jika impor berhasil, konfigurasi akan muncul pada daftar tunnel.
- Klik Activate untuk terhubung ke Helium VPN Server.
Langkah Konfigurasi
- Konfigurasikan akses tunnel WireGuard agar dapat menjangkau subnet target yang sudah Anda masukkan di Helium Cloud.
- Contoh menggunakan antarmuka
en0(cek dengan perintahifconfig)- Buat konfigurasi NAT:
sudo nano /etc/pf.anchors/com.helium-nat - Tambahkan konfigurasi berikut:
nat on en0 from 10.250.0.0/24 to any -> (en0) - Tambahkan konfigurasi PF:
sudo nano /etc/pf.conf - Tambahkan baris berikut di akhir file:
anchor "com.helium-nat"
load anchor "com.helium-nat" from "/etc/pf.anchors/com.helium-nat"
pass in on utun0 from 10.250.0.0/24 to any
pass out on utun0 from any to 10.250.0.0/24 - Validasi konfigurasi:
sudo pfctl -nf /etc/pf.conf - Restart layanan PF:
sudo pfctl -F all -f /etc/pf.conf
sudo pfctl -e - Aktifkan IPv4 forwarding:
sudo sysctl -w net.inet.ip.forwarding=1
- Buat konfigurasi NAT:
Verifikasi
- Pastikan server Anda dapat melakukan PING ke tujuan berikut:
- Server Helium, sesuai informasi di Helium Cloud pada bagian IP Address Whitelist (https://www.helium.sh/account?menu=security)
- Helium VPN Server dan port, seperti yang tercantum di https://www.helium.sh/vpn-access (pastikan workspace yang benar telah dipilih)
- Alamat IP VPN Server, yaitu 10.250.0.1