Schedule Scan
Description Schedule Scans
info
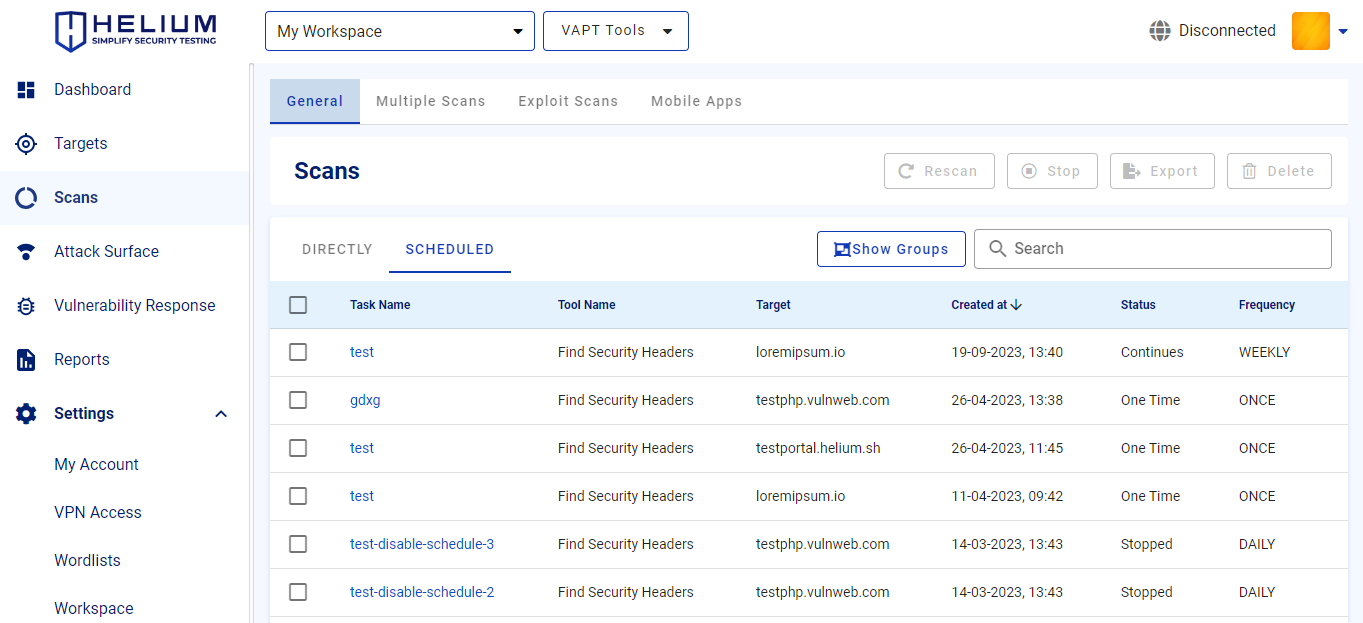
- Task Name is the name of the target being scanned
- Tool Name namely the tool used on the target
- Target is the target to be scanned in the form of a domain or IP
- Created at is when the schedule is made
- Status is the condition in which the schedule is created, which can be One Time, Continues or Stopped
- Frequency meaning how many times the target will be scanned
Steps Create Schedule Scans
note
To create a scan schedule, users first follow the scanning steps. After the user selects one of the tools, for example, Network Scanner, and also activates the schedule scan feature, the following input will appear.
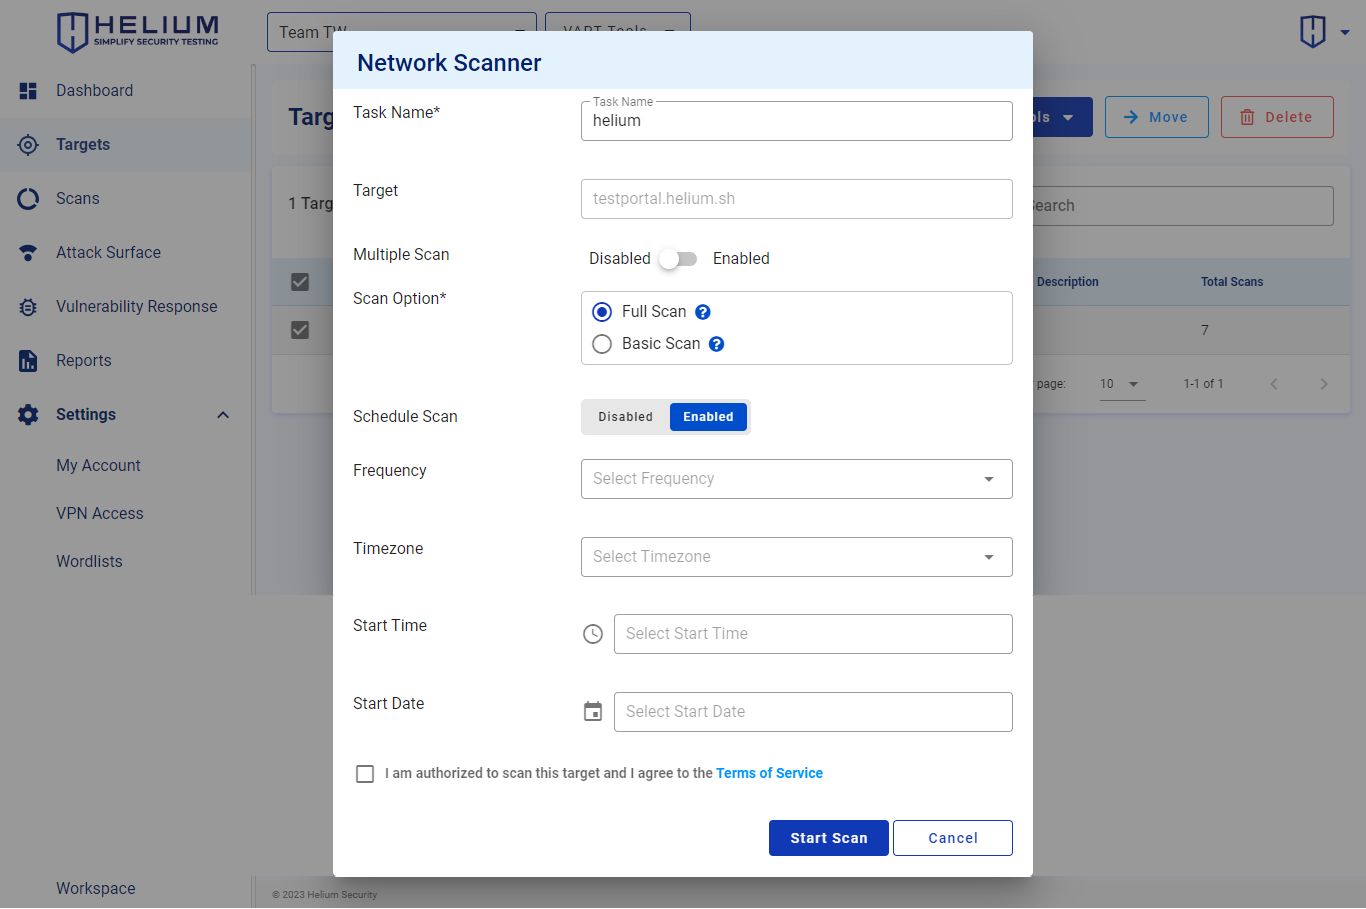 Users can follow the following steps.
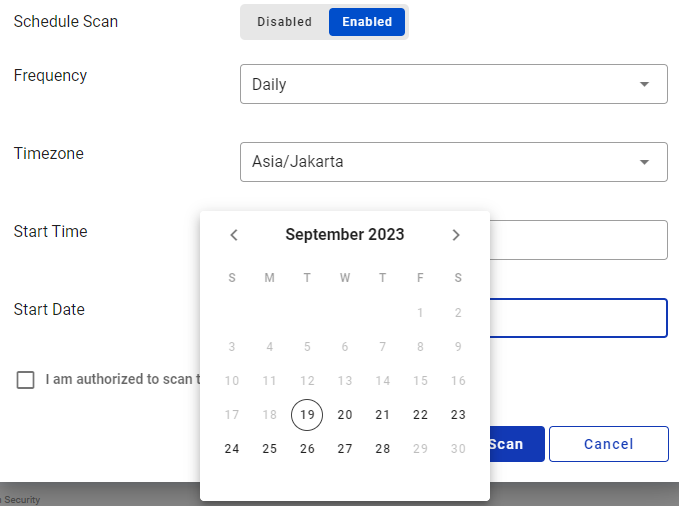
- After activating the scan schedule by clicking Enabled Schedule Scan, the Frequency, Timezone, Start Time and Start Date will appear.
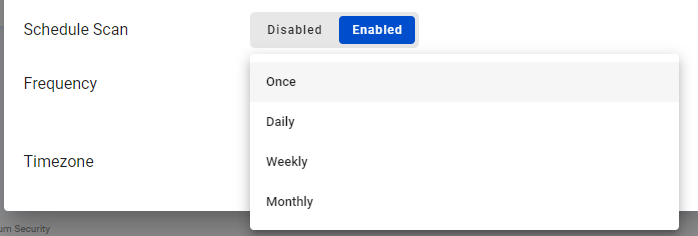
- Click the Select Frequency box, and the following options will appear. Click one of the frequency options
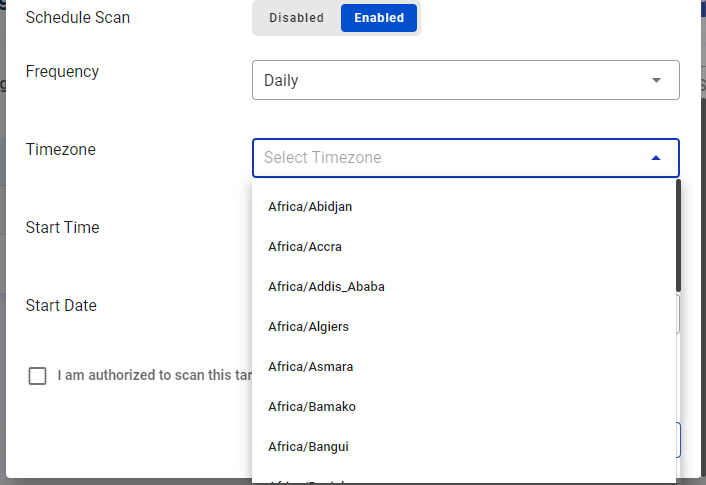
- Click the Select Timezone box, then various time zones will appear. Click on a time zone or you can type the desired time zone
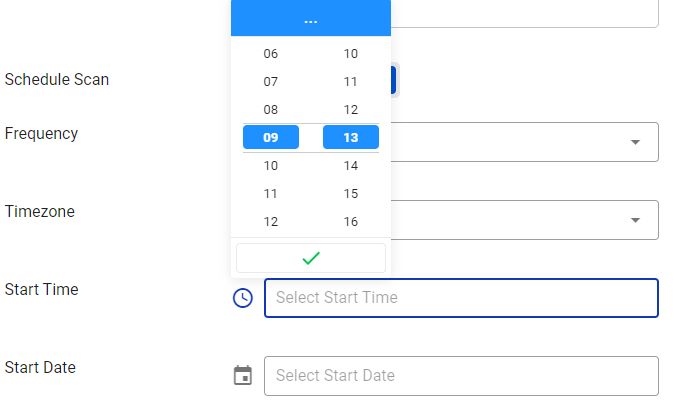
- Click the Select Start Time box, then the clock time options will appear. Click the desired time then click the green checklist
- Click the Select Start Date box, then a choice of dates will appear. Click the desired date
- Click the agree Terms of Service checkbox
- Click the Start Scan button to start the scan, and click Cancel if you want to cancel