Website Scanner
Discover vulnerabilities in web applications, including SQL Injection, and XSS.
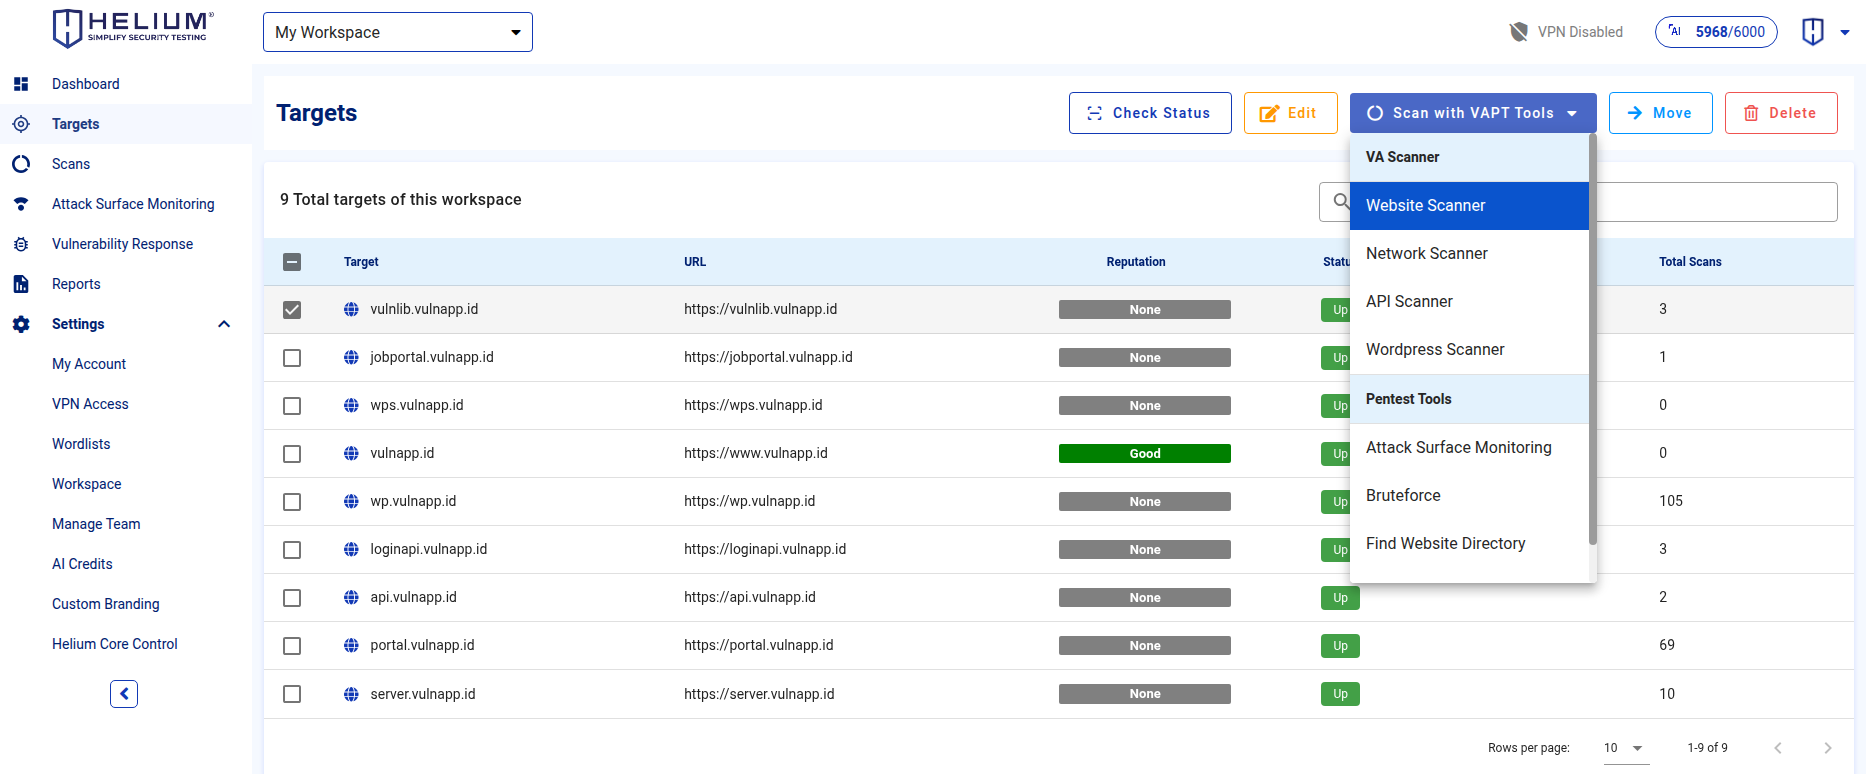
The selected target will be scanned with the available tools. Select Website Scanner Tool
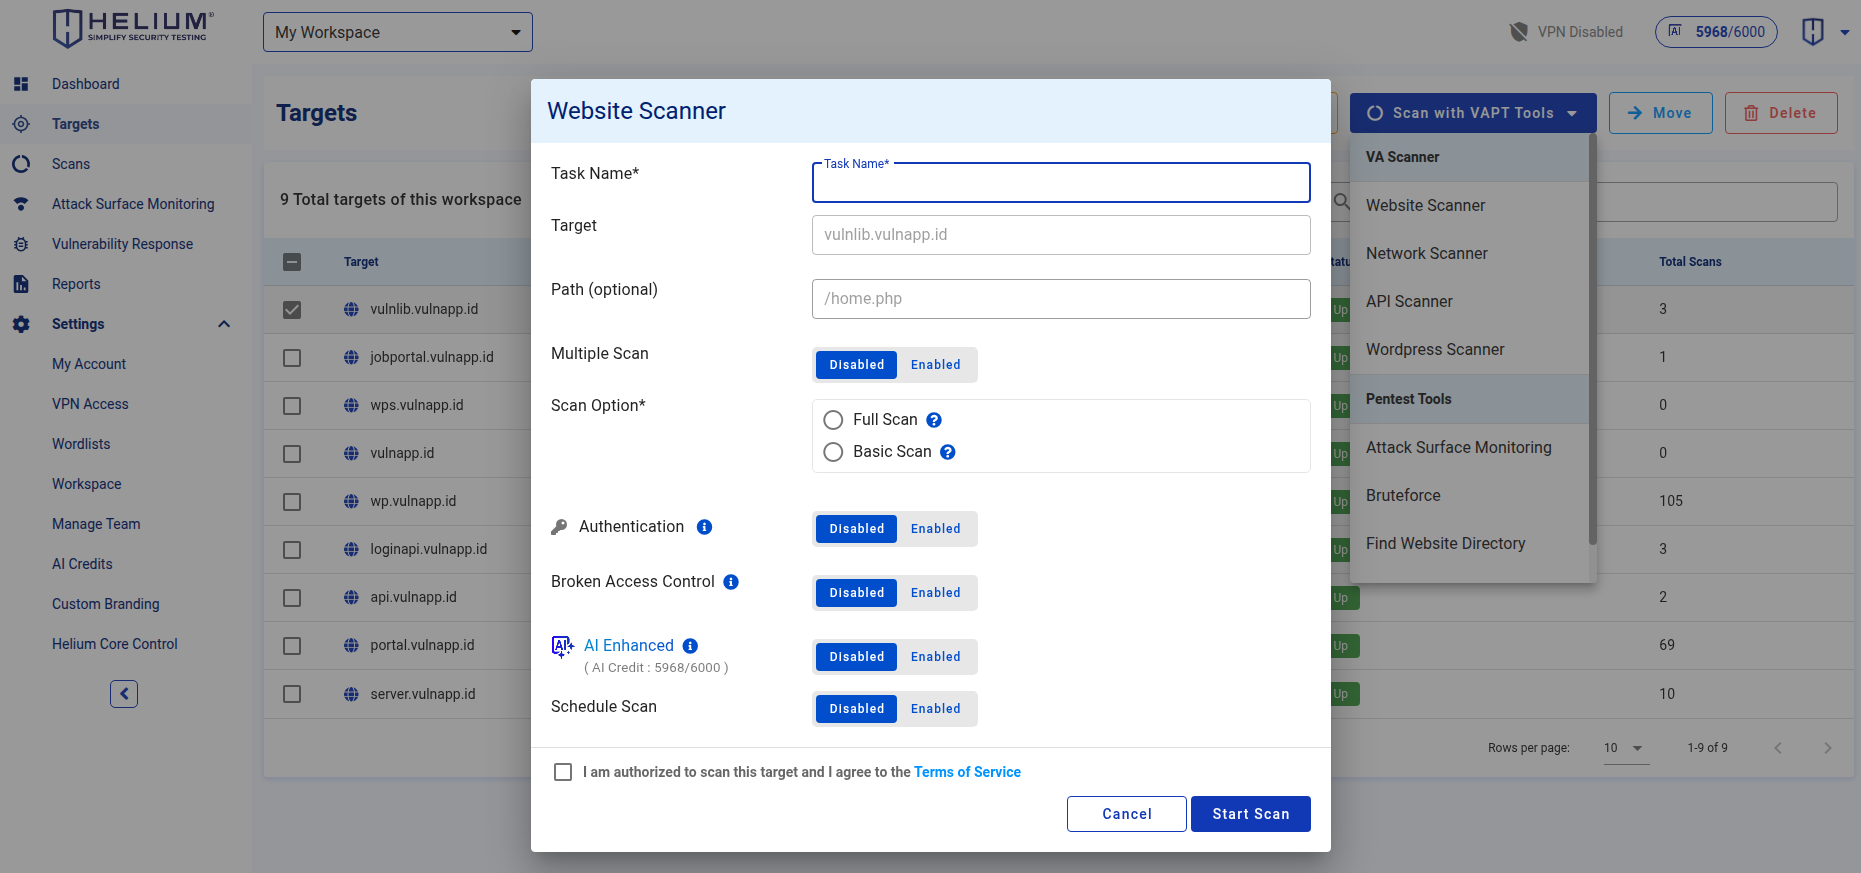
To scan using the Website Scanner, follow the steps below:
- Enter a name for the task in the Task Name field.
- Enter the path in the Path field (optional).
- Click Enabled to enable multiple scanning (optional).
- Select a scan option: Full Scan or Basic Scan.
- Click Enabled to enable Authentication (optional).
- lick Enabled to enable Broken Access Control (optional).
- Click Enabled to enable AI Enhanced scanning (optional).
- Click Enabled to activate a scheduled scan (optional).
- Check the "agree Terms of Service" checkbox.
- Click the Start Scan button to begin the scan, or click Cancel to abort.
By enabling the AI Enhanced feature, you will receive more precise descriptions and targeted mitigation recommendations for each identified finding, as well as an automatically generated architecture diagram of the scanned target.
Authenticated Scan
Authenticated Scan is a feature that facilitates security scanning of applications requiring authentication by leveraging cookies and web forms. It is fully compatible with the Broken Access Control testing feature, expanding the testing coverage to maximize the detection of potential vulnerabilities.
Running an Authenticated Scan with Website Scanner
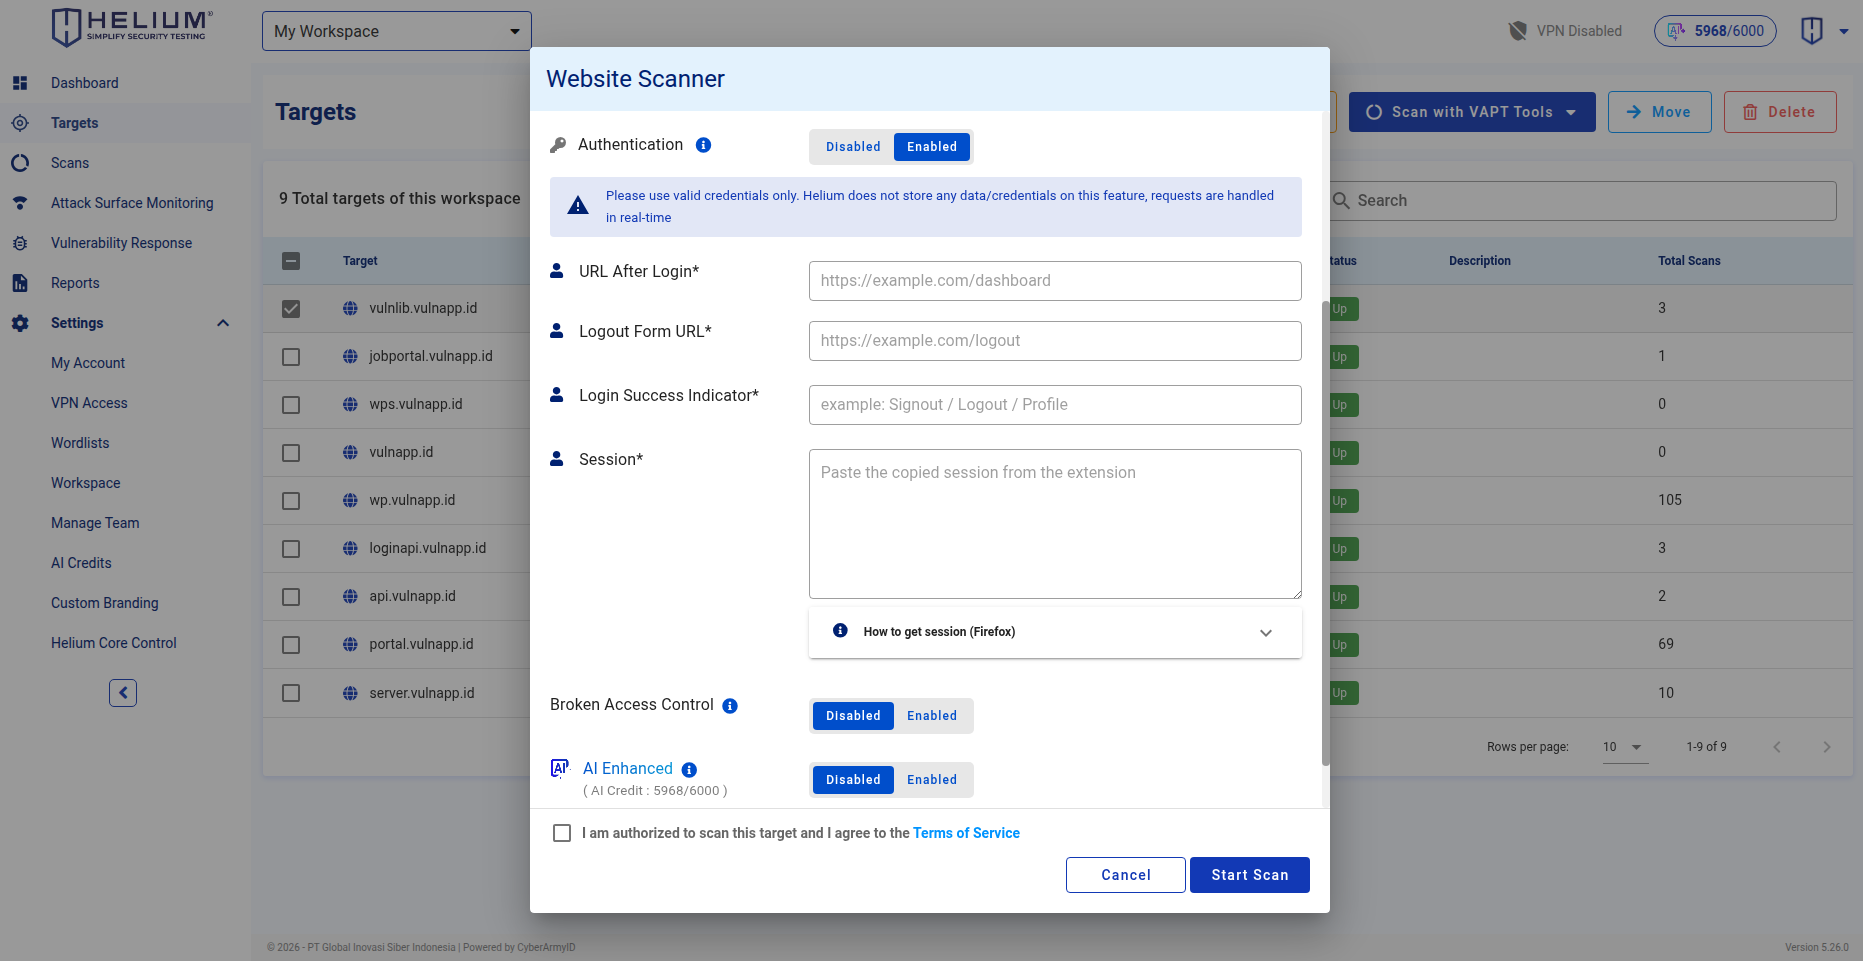 Follow these steps to configure and run an authenticated scan:
- Enable the authentication feature.
- Enter the URL After Login, which is the page that appears immediately after a successful login (e.g., https://vulnlib.vulnapp.id).
- Enter the Logout Form URL, which is the endpoint used to log out of the application (e.g., https://vulnlib.vulnapp.id/logout).
- Enter the Login Success Indicator, which is a unique text string or pattern that appears only on authenticated pages (e.g., "Logout").
- Enter the session data. You can easily retrieve this session data using the Helium Auth Exporter extension.
 note
noteTo install and use the Helium Auth Exporter extension, you can follow the steps provided in the How to get session (Firefox) tab.
- Check the box "I am authorized to scan this target and I agree to the Terms of Service."
- Click APPLY to save the authentication configuration.
8.If you want to enable Broken Access Control:
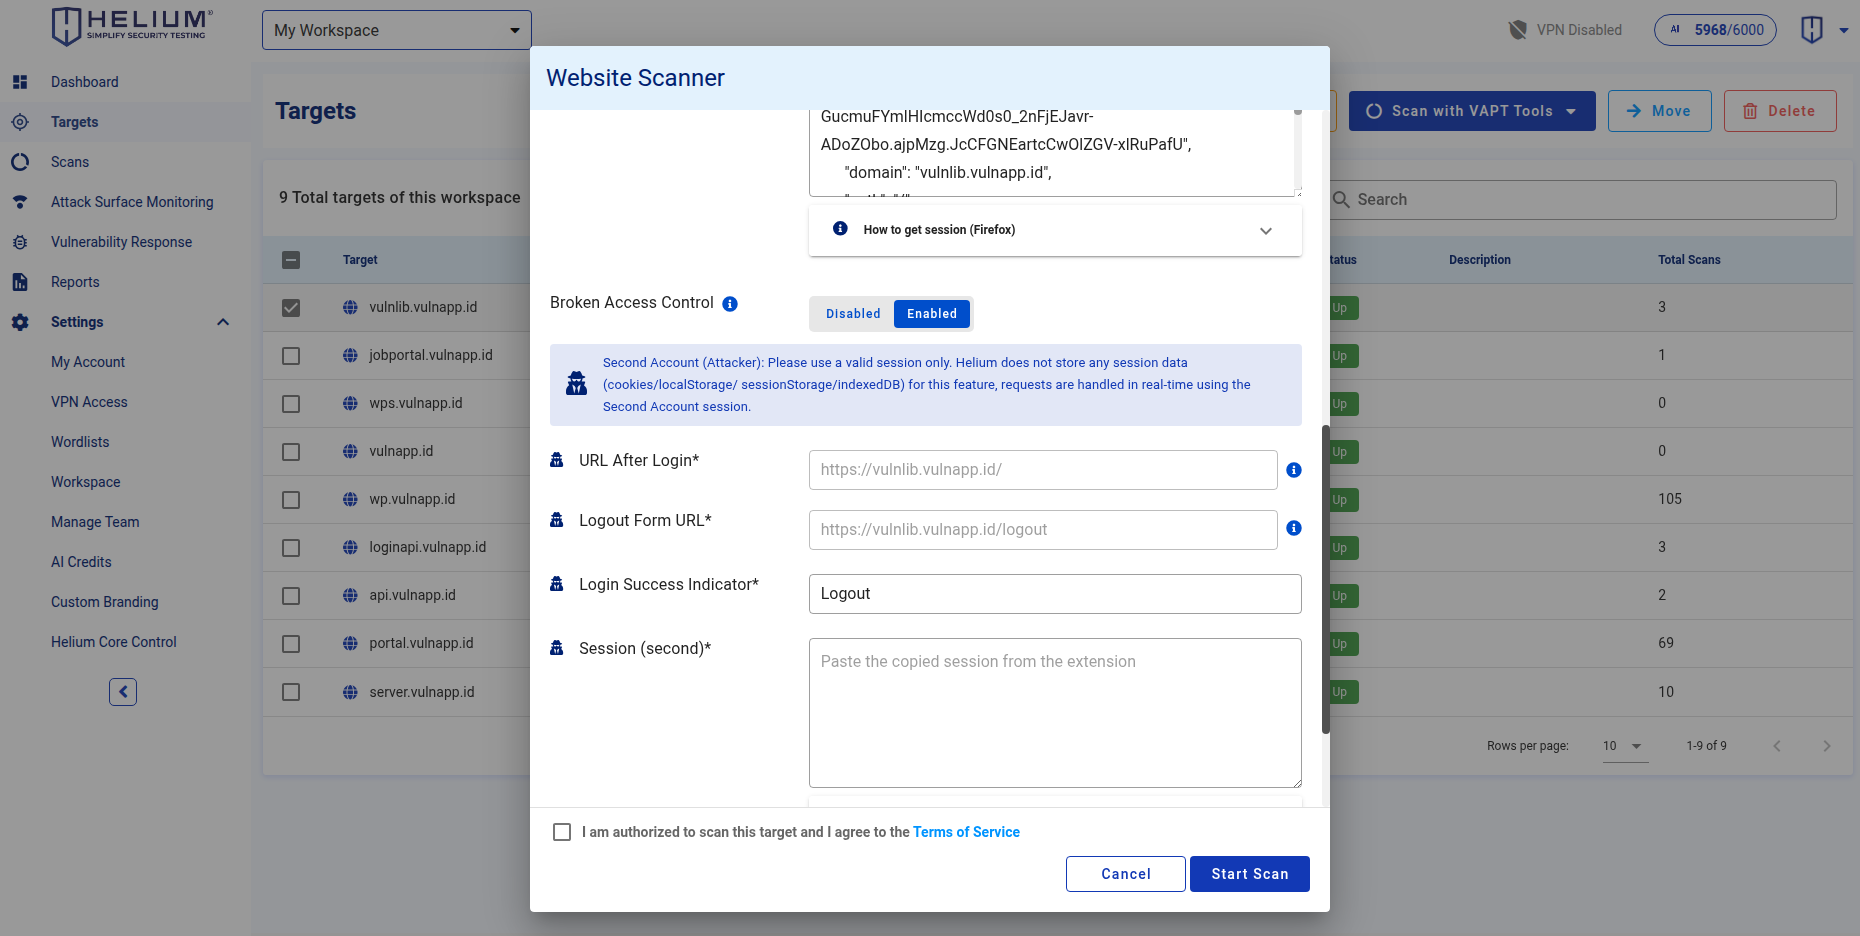
- Enter the Login Success Indicator for the second user session (e.g., "Logout").
- Enter a different user session. You can obtain this secondary session using the Helium Auth Exporter extension.
- Check the box "I am authorized to scan this target and I agree to the Terms of Service."
- Click APPLY to start the authenticated scan with Broken Access Control testing.
- If both the Authentication and Broken Access Control features are enabled, the Scan option will automatically switch to Full Scan, and the Schedule Scan feature will be disabled.
- Enabling the AI Enhanced feature will consume 10 AI credits.
- AI credits will be automatically rolled back if an authentication failure occurs. :::